Friday, March 31, 2006

Orange you glad............

I am..............so glad I planted this orange tree in September 2002. I have yet to harvest an orange, but today for the first time......buds, and lots of buds! I remember hearing somewhere that it takes 18 months for an orange to fully ripen, we'll see............patience.


I paid about $20 for this tree, during the fall 1/2 off sale at Yamagami's Nursery. It's a dwarf Valencia. It sure has grown and looks happy, and now I am happy to finally see it will actually bear fruit one day soon, and we will be drinking home grown fresh squeezed organic orange juice.


Orange Blossom Update
April 18, 2006


It's so fragrant!


July 18, 2007 - The oranges picked this week are sooooo sweet and delicious! They really do take almost 18 months to develope their sweetness. I had picked a bunch in February, before a frost was expected, and they were sour and terrible, and went in the compost. I won't pick them that early again! The frost didn't damage what was left at all.

Thursday, March 30, 2006

Incredible Edible Flowers

How lucky I am to live in this mild climate, where I can grow these cool season flowers year round, and always have something pretty, delicious and nutritious to eat from the garden.


All of these flowers (except the borage, that is now a volunteer in my garden) were starting by germinating the seeds on wet paper towels last August, leaving them indoors on my dining room table, where the temperature was perfect. I would spray them with water daily, so they would not dry out. But that was about it. Because I had so many going at once, I did put each in a labeled plastic bag, so I would know which was which. So a big thanks to Uncle Tom for sharing this method with me.

In the past, I was never able to succeed with germinating seeds, because it was always either too hot or too cold, or too wet or too dry, or the birds would get to them first.....for whatever reason I could not get the 100% germination rate that I am getting now. Every seed in a packet will germinate this way; in the past I was lucky to get one plant from a packet of seeds, so this has truly brought my gardening experience to a whole new level.


Stock, nasturtium, cornflower, borage, viola.......only a few edible flowers available to grow at Renees Garden. Don't forget my favorite, the Calendula.


After rinsing in water, just add the flower petals (the other parts may be bitter) to a bowl of mixed greens; toss in some dried cranberries, candied pecans and blue cheese. I like to use a raspberry venegarette dressing. Enjoy!

For more inspiration, read A veritable floral feast, by Tony Kienitz in the Los Angeles Times.

UPDATE: May 28

Pinks


Another great perennial edible flower to have in your garden. These were planted last year, and are just starting to bloom again this year. They will bloom till winter.

Wednesday, March 29, 2006

When Life gives you Lemons......

Relax and make my favorite Lavender Lemonade:


Make a simple syrup the night before using 3 cups of water with 2 cups of sugar. Bring to a boil, then pour over 1/4 cup dried lavender flowers in a quart masson jar, cover tightly and let infuse over night. Strain it in the morning. Mix 1/2 of this lavender simple syrup with 1 cup Myer Lemon Juice, in your 2 quart tupperware juice container, then fill with water. Save the other 1/2 Lavender Simple Syrup for another batch tomorrow. Enjoy!


I had my Dwarf Meyer Lemon Tree in the yard for a good 5 years (really, that long?), before I got a decent harvest this year. What patience.......I pruned it yearly to give it good circulation and a place to hang its fruit. It looks happy; pretty and healthy.

It seems to be blooming perpetually; lemons year round would be great. A few weeks ago, I was affraid of a frost, so I went out and picked all the ripe fruit, squeezed them and put the juice in the freezer. Today I see there are many more fruit ready to pick, and many more blosoms.


Arthur's Lemon Ice:

I named these after a favorite episode of "King of Queens". Now, whenever I watch that show (doesn't matter what episode), I am always in the mood for a lemon ice.

Make a simple syrup with 1 cup water and 1 1/2 cups sugar. Boil, then let cool completely. Add 1 cup Myer Lemon Juice and some fresh lemon zest. Add to Vita Mixer 1/2 filled with ice cubes. Ready in an instant.

Tuesday, March 28, 2006

2 Hip Chicks

I always dreamed of living on a farm, but it's not so bad being a City Chick anymore..........now that I have fresh eggs everyday!


We were able to squeeze these very comfotable living quarters in the corner of the yard, that once was an eye sore, but is now a cozy looking coop. All the wood was salvaged, so it was very inexpensive to build.

Meet Buella, and Henrietta. Each lays a different color egg everyday; brown and pink.


Bueller is a Barred Rock, very friendly and trusting.


Henrietta is an Ameraucanas. She is the mother hen. Always the first to roost at night. Her eggs are an unusual pale pink color.


WARNING - PROTECT YOUR TOMATOES


May 28, 2006 - so the chickens like tomato plants, go figure. Seems like they are recovering, already new growth down below, where the damage was done just one week ago.

Monday, March 27, 2006

You Say Pototo...............

I say Yukon Gold, Yellow Finn, Colorado Rose, and All Blue.


On February 24, I planted my first bed of Yellow Finn, Colorado Rose and All Blue potatoes. I received them in the mail earlier in the month from Peaceful Valley Farms, but was waiting for the eyes to sprout before planting (I put them in a paper bag with an apple to speed things up). When they were ready, I cut them into pieces with at least 3 eyes each, dipped them in wood ash (to protect them from bugs), and planted them. It took about 3 weeks for the little seedlings to sprout above the soil, but you can see them coming up in the photo.


You can plant potatoes 9" deep, but don't cover them with more then 3" of soil right away. As they grow above the soil, you can push more soil around them, so the stem continues to grow upward in the soil. This will give the plant good support for a good harvest, also, potatoes will only grow above the one you planted, not below, so you will get a bigger harvest, since they will have more soil above to grow in.


You also stake and string the potatoes as they grow using the diagonal string pattern to hold the stalks upright (it also keeps the chickens out of that bed), adding more levels of string as they grow taller. I planted these Yukon Gold's on March 19th, on April 4th they started peeking through the dirt.


This photo was taken one month later, on April 18.......looks like I'm gonna have some potatoes this year!


Potato Update:
April 13 - notice all the growth since planting 3" below the soil surface in February! Their big enough to start pushing the dirt around the stems. How nice when things go acording to plan.


May 9, first potato flowers


UPDATE: JUNE 27TH

4 months since planting - when your plants start to turn yellow/brown, and look like they are dying, they are ready to start harvesting.

Harvested bed of Yellow Finn, Colorado Rose, and All Blue

Sunday, March 26, 2006

Calendula


Calendula is becoming one of my most favorite flowers in the garden. I germinated these from seed, between wet paper towels, last August, then transplanted them into raised beds in the Fall. They have been blooming for months now.


They are easy to grow, and low maintenance...........and low maintenance is my #1 requirement for any plant.


They come in so many colors and have so many uses. The ones in the photos are a mix of Calendula officinalis, Deja vu and Pacific Beauty.


They are edible and medicinal. They have antifungal, antiseptic, astringent and anti-inflammatory properties......and look great in a salad!


I add the fresh flower petals to salads. I dry the entire flower heads, and use them in herbal baths or when making lotions and salves, and make tea with them too.


This year I found seeds with pink flowers (Calendula Antares Flashback) from Johnny's Seeds . I started the seeds on February 2 between wet coffee filters, and transplanted them into dixie cups a week later. Now they have their second set of leaves and can be transplanted into my raised beds any time or as soon as it stops raining! I like to use them as a border plant, because they attract beneficial insects, and make the vegetable beds look beautiful.

Saturday, March 25, 2006

A Special Visitor Last Night


This may sound crazy, but this is what happened in our house last night................while we were sleeping, I was awakened by a loud crashing sound. It sounded like someone drop kicked the remote (is everyone familiar with that sound?). I wasn't getting up, just cursed that I would have to be ordering yet another remote control, turned over and went back to sleep. When I got up in the morning, Julia was asleep on the couch, and the remote was safetly lying next to her. Hum........I went into the kitchen and found Uncle Tom's photo and "The Maine Woods" book (see photo above) lying in the sink...........that's what went crash in the night! But they have been on that shelf above the sink since Christmas......why, all of a sudden, were they knocked over in the middle of the night - and on Tom's birthday?

I don't know what your thinking, but..............I'm certain I had a special visitor last night........and I'm happy to report that all is well with him;).

Thank you Tom.


Here is a photo taken today of Uncle Tom's Garden..............usually it is nothing but weeds at this time of year! All these flowers were started from seed last August, using Uncle Tom's amazing method of success. Thank you Uncle Tom!

Friday, March 24, 2006

Black-Eyed Susans


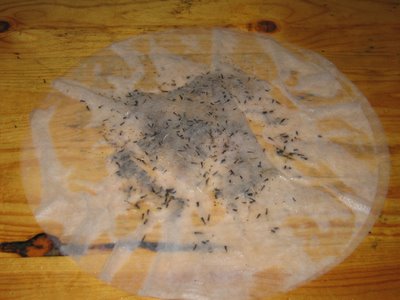
These seeds were given to me by my mother, who collected them from Uncle Tom's Maine Garden last summer, when she was visiting him. In honor of Tom's birthday today, I am starting these seeds, using Uncle Tom's Method. Hopefully, these beautiful flowers will be blooming in Uncle Tom's Garden in California before too long. Anyone who would like to add some of Uncle Tom's Black-Eyed Susans to their own garden, let me know, and I will be happy to share some seeds.

The real beauty of these Black-Eyed Susan Flowers are in the power of their essence. How appropriate that their positive healing patterns will help us embrace what we are resisting and, can help fill ourselves with a deep sense of inner peace. Once again, thank you Uncle Tom, for helping us get through your passing with your beautiful flowers.


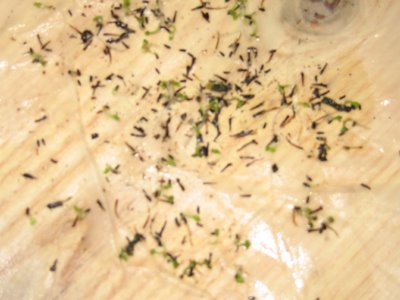
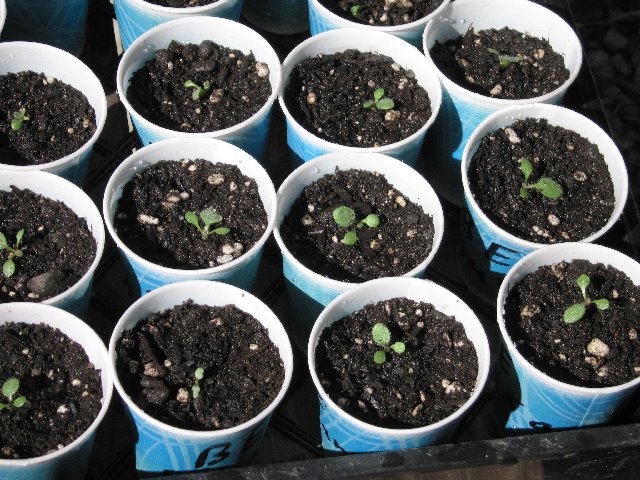
Friday, March 31 - it's been one week, can you see the green in the photo? These seeds have started to germinate! Yea! Thank you Uncle Tom. Today I will transfer those that are germinated into soil, in dixie cups, until they are ready to plant directly outdoors. Those that haven't germinated yet, I will leave on the coffee filter until they are ready. I think we will have many Black Eyed Susans.


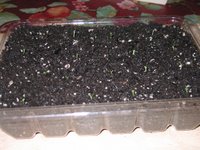
April 1 - well, I decided to transplant them into this disposable food container I reyceled from Whole Foods. It was raining all day, and I decided to work inside at the dining room table, and the dixie cups would have made too much of a mess. I took this picture this morning, and I am happy to observe they have survived the night, and are actually thriving on the top shelf of my kitchen green house window. Until they get bigger, I will just spray/mist them with water. Very gentle.


Black Eye Susan update
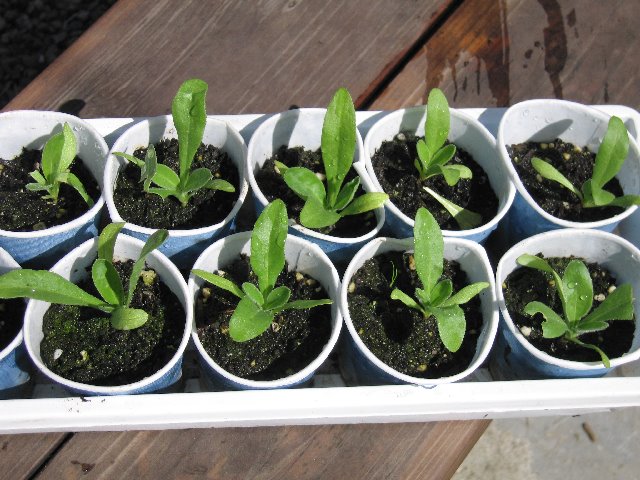
April 17


I transplanted them into individual dixie cups (1 plant per cup). I should have taken a photo of the root system, a lot has been happening below the surface of the soil, even though the plants themselves still look small.


Update May 12 - ready to transplant out to their permanent location!
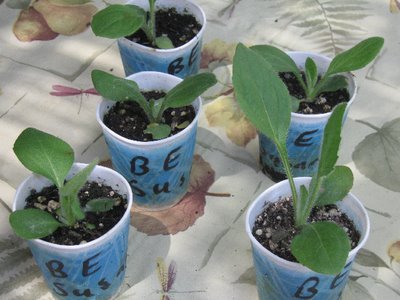


UPDATE: MAY 28

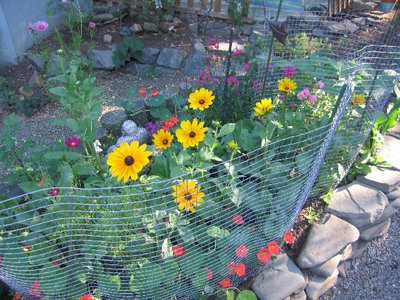
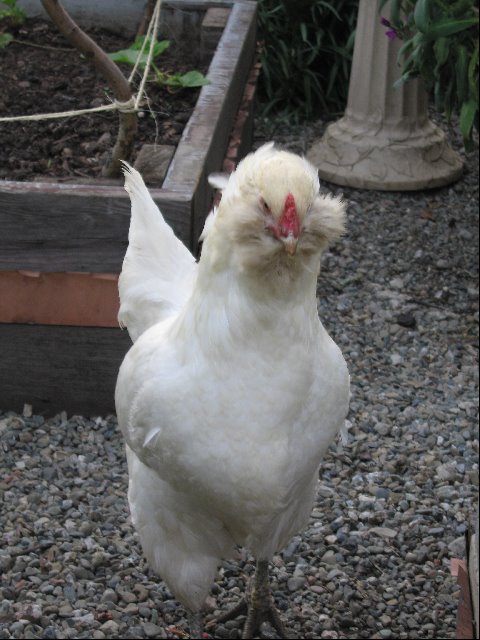
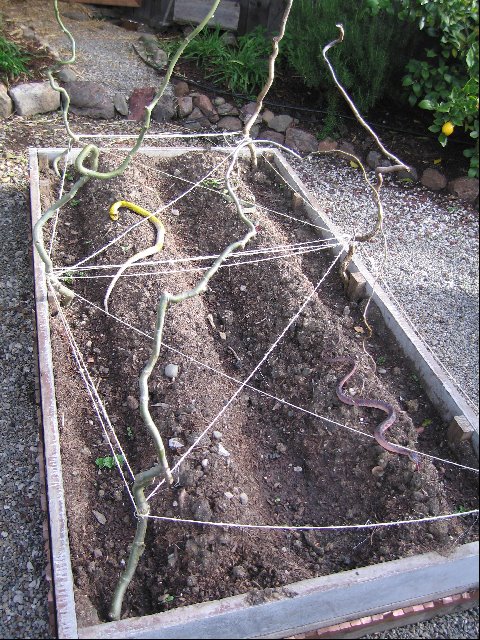
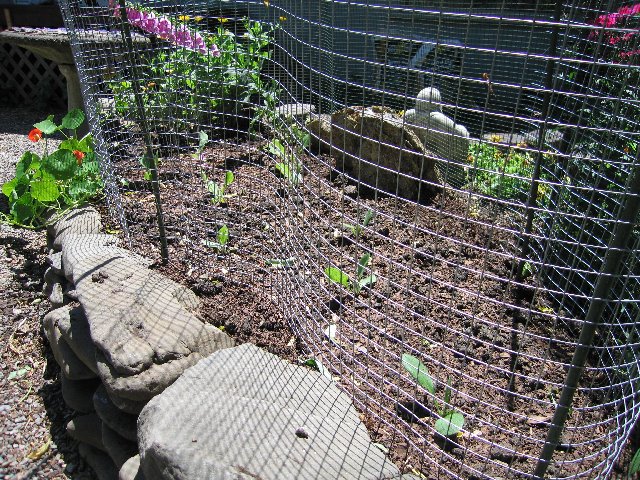
I decided to put as many as would fit in the Buddha Bed. The chickens got to them right away, so I am now protected them till they get large enough.

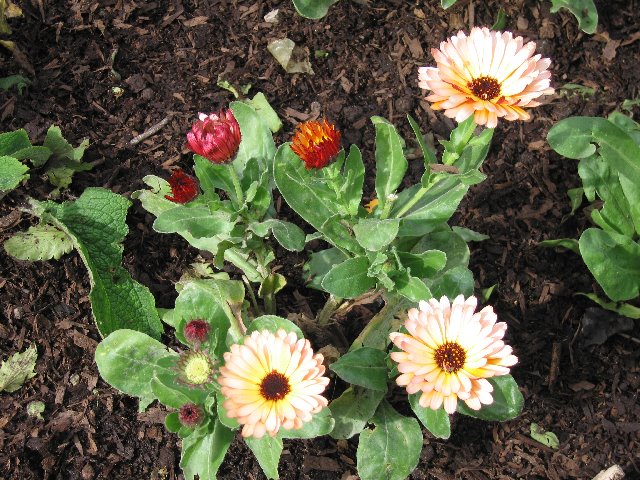
UPDATE: JULY 15 - first bloom


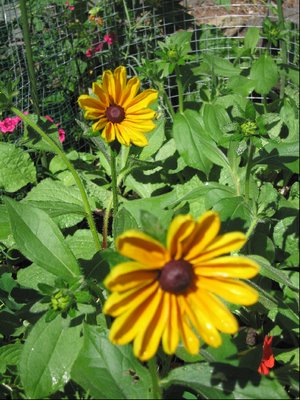
Bloomed through October in Buddha Bed

Thursday, March 23, 2006

Happy Birthday Tommy, I Miss You


Tomorrow is my brother Tom's Birthday (and Richie's too - Happy Birthday Richie - Love Ya). Tommy would be 48 years old, but he's gone, and I miss him. But right before he left, he gave me the most amazing gardening advice, and my garden has not been the same since. Now it is so much more............more flowers, more vegetable, more love..............more everything. And its all thanks to him. He is gone now, but he has changed my life, and made me so happy. So I dedicate my garden to him, where he will live on and always have a special place.

This is what happened to me.................my brother Tom, who lived in Maine, came to visit me in California last August. I was complaining about how I have a terrible time starting seeds, they never germinate. He taught me a trick, I never imagined it would be so successful. He told me to start the seeds between wet paper towels and after they sprout plant them. So I tried, and oh my god, I had so many plants, I was giving them away! The seeds I was starting that day in August were Snow Pea's for my winter garden. On September 13, when I got the news of his death, I was quickly watering my garden before leaving for his funeral in Maine, when I noticed my Snow Peas had its first bloom! A most beautiful purple flower! That was a sign for me, Tom was alive, and he was in my garden. And there he shall always be............